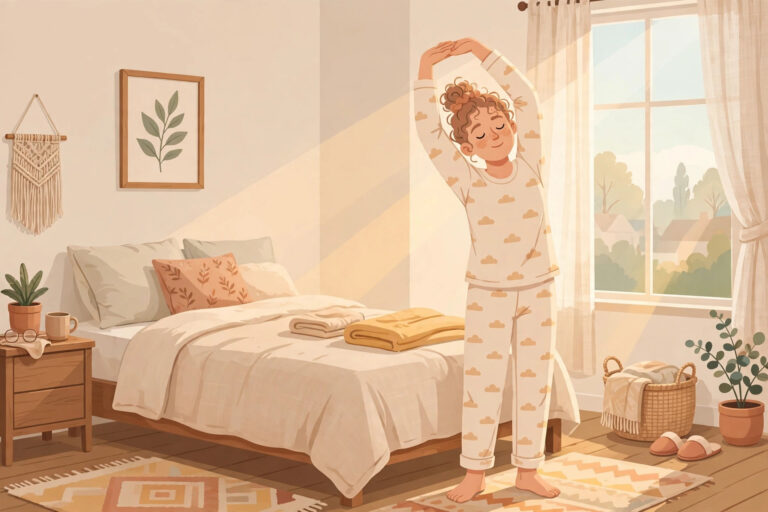

How to Improve Your Posture at a Desk: 9 Simple Fixes
If you spend your working day at a desk, you have probably caught yourself in the classic slump: shoulders rolled forward, head craned toward the screen, legs crossed, feet tucked under the chair. Most of us do not choose this position — we drift into it, one busy hour at a time, until our chair, screen, and habits quietly conspire to fold us in half. The good news is that learning how to improve your posture at a desk rarely requires buying anything expensive. It mostly requires setting up what you already have in the right places, then checking in often enough to catch the slump early.
Table of Content
- Why Desk Posture Slips (It Is Usually the Setup, Not You)
- Fix 1: Set Your Chair Height So Your Feet Rest Flat on the Floor
- Fix 2: Raise Your Screen to Eye Level, About an Arm's Length Away
- Fix 3: Bring Your Keyboard and Mouse Close, and Keep Your Wrists Level
- Fix 4: Support Your Lower Back With a Cushion or a Rolled Towel
- Fix 5: Laptop User? Raise the Screen and Add an External Keyboard
- Fix 6: Run a 30-Second "Check-In" Scan Whenever You Sit Down
- Fix 7: Follow the 30-Minute Movement Rule
- Fix 8: Loosen Up With These 5 Simple Desk Stretches
- Fix 9: Fix Your Phone Habits (The Slump Between Tasks)
- Your Daily Posture-Habit Plan
- When to See a Doctor or Physiotherapist
- Frequently Asked Questions
- What is the correct sitting posture at a desk?
- How often should I get up from my desk?
- Do I need an expensive ergonomic chair to improve my posture?
- Can changing my posture get rid of my back or neck pain?
- How long does it take to build better posture habits?
- Conclusion
This guide walks through 9 simple fixes, cheapest and easiest first. The first five are about your setup — chair, screen, keyboard, back support, and laptop position — because your body naturally follows your furniture. The rest are about habits: how you sit, how often you move, a handful of gentle desk stretches, and what you do with your phone. Each fix explains what to change, how to do it step by step, and what it costs (usually nothing). Everything here is framed as everyday comfort advice — small adjustments that may help your working day simply feel easier on your body.
One honest note before we start: posture is not about sitting bolt upright like a soldier all day. A “perfect” frozen position held for eight hours is neither the goal nor realistic. The goal is a comfortable, supported starting position, plus regular movement — even the best sitting posture gets tiring if you never leave it. Set up well, check in often, move a little every half hour. That is the whole system.

Why Desk Posture Slips (It Is Usually the Setup, Not You)
It helps to stop blaming your willpower. People rarely slouch because they are lazy; they slouch because the desk is asking them to. If your screen sits too low, your head tips forward to see it. If your chair is too high, your feet dangle and you slide forward to find the floor. If your keyboard is at the far edge of the desk, your shoulders reach all day. Your body is constantly solving the puzzle your setup gives it — so the smartest first move is to give it a better puzzle.
Think of posture as two layers. The first is position: where your chair, screen, and keyboard sit relative to your body. The second is time: how long you stay in any one position before moving. Most posture advice only covers the first layer, which is why it so often fails by 11 a.m. This guide fixes both. Fixes 1–5 arrange your workspace so a comfortable position is the easy position. Fix 6 gives you a 30-second scan to reset yourself during the day. Fixes 7–9 handle the time layer — movement, stretching, and phone habits.
You also do not need to do all nine today. The setup fixes take about fifteen minutes in total and only need doing once. After that, your only job is the check-in scan and the movement rule. Small and repeatable beats grand and occasional, every time.
Fix 1: Set Your Chair Height So Your Feet Rest Flat on the Floor
Everything starts with the chair, because it decides where the rest of you ends up. The target position is simple: feet flat on the floor, knees roughly level with or just below your hips, and a small gap — about two or three fingers — between the back of your knees and the front edge of the seat.
What it is: The foundation fix. When your feet are planted flat, your legs share your weight with the chair, your pelvis sits level, and your back can rest against the backrest instead of sliding forward. If your feet dangle, you will slump. If your knees are jacked up high, you will perch. Flat feet fix both.
How to do it, step by step:
- Sit in your chair with your back against the backrest and look down at your feet. Are they flat on the floor, or are you on tiptoes, or dangling?
- Find the height lever (usually under the right side of the seat) and raise or lower the chair until your feet rest fully flat, with your thighs roughly parallel to the floor.
- Check the seat depth: slide back until your back touches the backrest. If the seat edge presses into the back of your calves, your chair is a little deep — a cushion behind your back (Fix 4) also solves this by moving you forward.
- No adjustable chair? Work with what you have. Too high: put a sturdy box, a stack of books, or a low stool under your feet so they rest flat instead of dangling. Too low: sit on a firm cushion to raise yourself.
Cost: Free. A footrest substitute is whatever sturdy box is already in a cupboard.
Time needed: Two minutes, once. Recheck only if you change chairs.
Fix 2: Raise Your Screen to Eye Level, About an Arm’s Length Away
Your head weighs roughly as much as a bowling ball, and every few centimetres it tips forward, the muscles at the back of your neck work harder to hold it up. A screen that sits too low quietly pulls your whole upper body into a hunch.
What it is: Screen position sets head position, and head position sets everything else. The commonly recommended arrangement — reflected in guidance from the Mayo Clinic’s office ergonomics overview and OSHA’s computer workstations eTool — is: the top of the screen around eye level (or just slightly below), and the screen roughly an arm’s length away from you.
How to do it, step by step:
- Sit in your newly adjusted chair, in your normal working position, and look straight ahead. Your eyes should land near the top third of the screen — most people do their reading in the band just below the top.
- If you have to tilt your chin down noticeably to read, the screen is too low: raise it. A monitor arm is nice, but a stack of sturdy books, a ream of paper, or a small box works exactly as well.
- Stretch one arm out in front of you. Your fingertips should just about graze the screen. Much closer and you will lean back or crane; much further and you will lean in and squint — both end in a slump.
- Using two screens? Put the one you use most directly in front of you, at the same height — a screen permanently off to one side twists you for hours at a time.
Cost: Free with books or a box. A basic monitor stand is an optional later upgrade, not a requirement.
Time needed: Five minutes, once.
Fix 3: Bring Your Keyboard and Mouse Close, and Keep Your Wrists Level
Reaching is the silent posture killer. A keyboard pushed to the back of the desk looks tidy and wrecks shoulders: your arms extend, your shoulder blades slide forward, and your head follows them. Everything you touch all day should live within easy reach.
What it is: Your keyboard and mouse should sit close to the edge of the desk, roughly level with your elbows when your shoulders are relaxed and your upper arms hang naturally. Your wrists should stay fairly straight and level while you type — not bent up, down, or sideways — and your mouse belongs right beside the keyboard, not a shoulder-stretch away.
How to do it, step by step:
- Pull your keyboard toward you until there is just enough desk in front of it to rest your palms during pauses (not while typing).
- Line the keyboard up with your body: the letter keys — roughly the B key — should sit in front of your belly button, so you are not typing at an angle.
- Check your elbows: they should rest near your sides, bent at about 90–110 degrees, with your shoulders down and relaxed. If your elbows are floating forward, the keyboard is still too far away.
- Move your mouse directly beside the keyboard at the same height. Move it with your whole forearm rather than flicking your wrist side to side.
Cost: Free — everything here is moving things you already own.
Time needed: Two minutes, once.
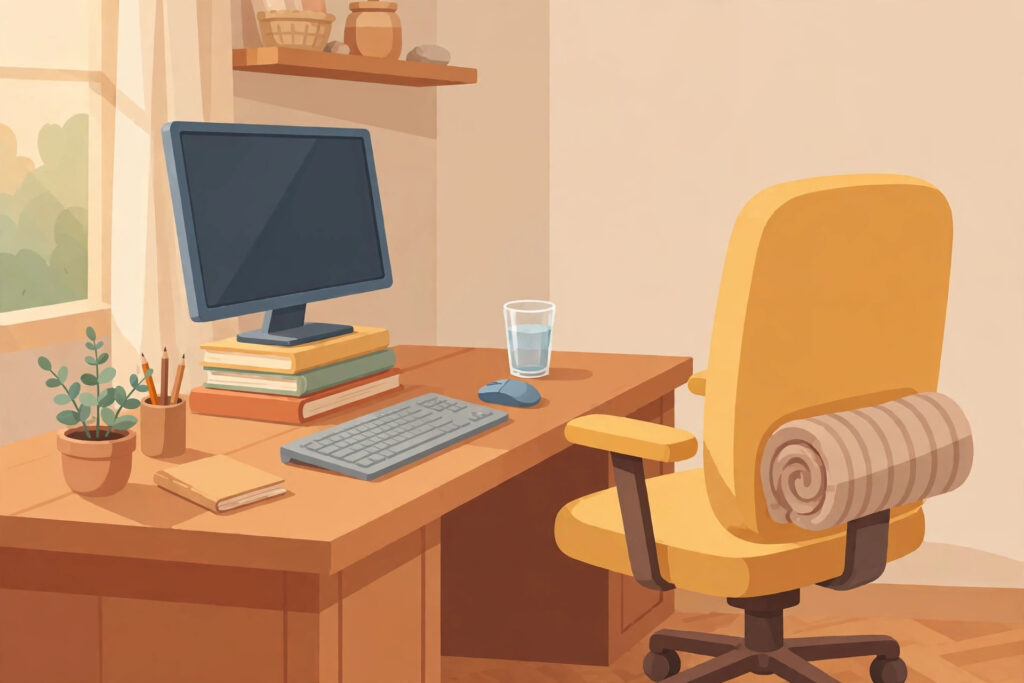
Fix 4: Support Your Lower Back With a Cushion or a Rolled Towel
Sit in most dining chairs, car seats, and cheap office chairs, and you will find the same problem: the backrest is fairly straight, your lower back has a gentle natural inward curve, and nothing fills the gap between the two. Within twenty minutes your pelvis rolls backward, your lower back flattens, and the slouch travels upward. A small support in that gap helps you sit back comfortably instead of curling forward.
What it is: Lumbar support is simply something firm-ish filling the space between your lower back and the chair, so your back can rest instead of work.
How to do it, step by step:
- Take a small cushion, a folded pillow, or — the classic — a hand towel rolled into a firm cylinder about as thick as your forearm.
- Sit back fully in your chair. Slide the roll into the small of your back, just above your belt line, where the inward curve is.
- Lean back and let the chair take your weight. The roll should feel like gentle contact, not a push. If it shoves you forward or feels bulky, unroll it a little or use a thinner fold.
- In a car or on a train seat, do the same with a scarf or sweater — the rule travels.
- Over a week, experiment: slightly higher, slightly lower, slightly thinner. The right spot is the one where you stop thinking about your back.
Cost: Free (towel or cushion you own). Dedicated lumbar rolls exist, but they are firmly in the optional category.
Time needed: One minute to place; a few days of small adjustments to perfect.
Fix 5: Laptop User? Raise the Screen and Add an External Keyboard
The laptop is a posture compromise by design: screen and keyboard are attached, so one of them is always in the wrong place — screen low enough to type on means staring down; screen at eye level means hands floating up to type. If you work on a laptop for more than an hour or two a day, separating the two halves is the single biggest upgrade you can make, and the budget version costs almost nothing.
What it is: Raise the laptop so its screen sits at eye level (Fix 2’s rule), then put a separate keyboard and mouse or trackpad down at elbow height (Fix 3’s rule). The laptop becomes a screen only.
How to do it, step by step:
- Stack sturdy books, a box, or a laptop stand under your laptop until the top of the screen is about eye level and roughly an arm’s length away. A slight upward tilt of the lid is fine.
- Plug in any external keyboard and mouse — the spare set in a drawer, the cheapest wired set you can find, whatever works. Place them close to the desk edge, as in Fix 3.
- Sit back and check the pair together: eyes level with the top third of the screen, elbows by your sides, wrists level, feet flat.
- Only have a stand for part of the day (hot-desking, café)? Prioritise the keyboard: even with the laptop flat on the desk, an external keyboard stops you hunching your shoulders inward over the built-in one — and stand the laptop on books whenever you can.
Cost: Free if you already have books and a spare keyboard; a basic wired keyboard-and-mouse set is one of the cheapest useful purchases in this guide.
Time needed: Five minutes, once — then it is just how your desk lives.
Fix 6: Run a 30-Second “Check-In” Scan Whenever You Sit Down
Your setup gives you a good position to start from; the check-in scan is how you get back to it, because nobody holds any position all day. Every time you sit down — and whenever you catch yourself mid-slump — run this quick top-to-toe scan. It takes about thirty seconds and soon becomes automatic.
What it is: A simple sequence of small cues you check in order, from the ground up. Not a stiff “sit up straight” command — just returning each body part to the neutral, supported place your setup was arranged for.
How to do it, step by step:
- Feet: both flat on the floor (or your foot box), roughly hip-width apart. Uncross your legs; crossed legs twist everything above them.
- Seat: scoot back until your back meets the backrest and your lumbar roll. Your weight should feel spread across both sides evenly.
- Back and shoulders: let your back rest against the chair. Roll your shoulders up, back, and down once, then let them drop — wherever they land after the drop is their relaxed home.
- Head: imagine a string gently lifting the crown of your head. Tuck your chin very slightly — a small nod, not a military brace — so your ears sit roughly over your shoulders rather than ahead of them.
- Screen check: eyes forward to the top third of the screen. If you are reading with your chin on your chest, it is the laptop that needs raising (Fix 5), not your effort.
Cost: Free.
Time needed: Thirty seconds, several times a day. Pair it with something you already do — opening your inbox, finishing a call, coming back from the kettle — so the habit attaches to a trigger.
Fix 7: Follow the 30-Minute Movement Rule
Here is the rule that matters more than every setup tip combined: do not sit still for more than about 30 minutes at a time. Your body is built to move, and it starts quietly complaining — stiffness, fidgeting, drifting concentration — when it has been parked too long, whatever position it was parked in. The best posture, as ergonomists like to say, is your next posture. What it is: A rhythm, not a workout. Every half hour or so, change position in a real way: stand up, walk somewhere, or do a stretch or two (Fix 8). Two minutes of movement buys back far more comfort than it costs.
How to do it, step by step:
- Set a gentle timer — phone, watch, or a free break-reminder app — for every 30 minutes. When it goes off, you do not have to leap up mid-sentence; just finish your thought and move within the next few minutes.
- Give the break a destination: refill your water, walk to the printer, take the stairs once, step outside for daylight. Water is a perfect anchor — a glass that needs regular refilling builds the walking in.
- Working from home? Use household errands as breaks: hang the washing, water a plant, walk to the postbox. If you are building up general activity, our guide on how to start a walking routine for beginners shows how desk-day steps can grow into a simple daily habit.
- Take phone calls standing or walking where you can — the movement happens by itself.
- Alternate positions across the day if you have the option: a standing desk for some tasks, a different chair for reading. Variety is the point.
Cost: Free.
Time needed: About two minutes in every thirty — and most people find focus sharper afterwards, not duller.
Fix 8: Loosen Up With These 5 Simple Desk Stretches
Stretching at your desk is not a fitness program — no mat, no change of clothes, no privacy needed. These five gentle stretches target the places that tighten up in sitting — neck, shoulders, chest, back, and hips — and each takes under a minute. Move slowly, breathe normally, and stay in the range that feels like a pleasant stretch, never a strain. For a fuller routine to start the day, our guide on how to start a morning stretching routine for beginners pairs naturally with these.
1. Chin tuck (neck reset). Sit tall with your eyes forward. Gently draw your chin straight back, as if making a double chin, keeping your eyes level — do not tip your head down. Hold 3–5 seconds, release, and repeat 5 times. You should feel a mild stretch at the back of your neck.
2. Ear-to-shoulder stretch. Sit tall and let your right ear ease toward your right shoulder, keeping the shoulder itself down and both eyes facing forward. Stop when you feel a gentle stretch along the left side of your neck. Hold 15–20 seconds, then switch sides. Do not pull on your head with your hand; gravity is enough.
3. Shoulder rolls and squeeze. Roll both shoulders slowly in big circles — up, back, down, around — 5 times, then reverse direction 5 times. Finish by gently squeezing your shoulder blades together for 5 seconds, as if holding a pencil between them, then release. Repeat the squeeze 3 times.
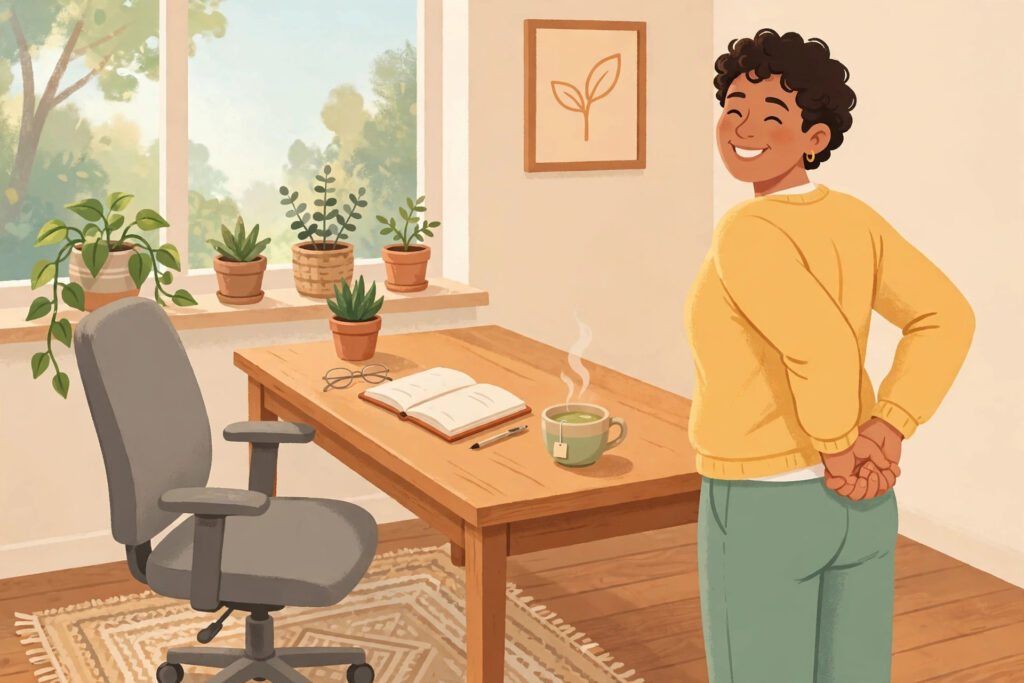
4. Chest opener. Sit near the front edge of your chair, clasp your hands behind your back, and straighten your arms gently while lifting your hands slightly and opening your chest. Hold 15–20 seconds, release, and repeat twice. This is the direct opposite of the keyboard hunch.
5. Seated figure-four (hip stretch). Sit tall, cross your right ankle over your left knee, and let the right knee relax outward. Keeping your back straight, lean forward slightly from the hips until you feel a stretch in your right hip and buttock. Hold 20–30 seconds, then switch sides. If your hip will not comfortably do this, simply stretch one leg out straight, heel on the floor, and lean forward gently instead.
How to use them: Pick two or three at each movement break rather than all five every time, rotating through the day: chin tucks and shoulder rolls at the first break, chest opener and neck stretch at the next, figure-four whenever you stand up to make tea.
Cost: Free.
Time needed: One to three minutes per break.
Fix 9: Fix Your Phone Habits (The Slump Between Tasks)
Your desk setup can be perfect and your phone can still undo it. The classic phone position — head tilted down, neck flexed, shoulders rounded over a small screen — often happens while “resting” from work: scrolling at lunch, replying to messages, reading on the sofa. Comfort guides from sources like the NHS common posture mistakes and fixes page make the same basic point: it is the sustained bent-forward position that matters, whatever screen causes it.
What it is: Not giving up your phone — just raising it and time-limiting the bent-over scroll, so your neck gets the same consideration at leisure that it gets at work.
How to do it, step by step:
- Raise the screen, not your standards. When reading or watching for more than a minute or two, prop the phone up: on a stand, a stack of books, or against a cushion, closer to eye level. For longer reading, send it to a bigger screen — tablet, laptop, TV — at a comfortable distance.
- Support your arms. If you hold the phone, rest your elbows on a cushion or the armrests. Unsupported arms drift downward, and the phone — and your head — follow.
- Use voice and audio sometimes. Dictate replies instead of typing long ones; listen to podcasts and audiobooks rather than reading everything on the small screen.
- Set a scroll limit you will actually keep. “Until this drink is finished,” then put it down and move. Doomscrolling is the longest static posture most of us hold all day.
Cost: Free.
Time needed: No extra time — just different positions for time you already spend.
Your Daily Posture-Habit Plan
Fixes fade when they stay a to-do list; they stick when they become a day with a shape. Here is a simple rhythm that weaves all nine into an ordinary desk day.
Morning (2 minutes). Arrive, sit, and run the setup check in order: chair height and feet flat (Fix 1), screen at eye level and an arm’s length (Fix 2), keyboard pulled close (Fix 3), lumbar roll in place (Fix 4). Then run the 30-second check-in scan (Fix 6). That is the whole ritual — by the time your computer has woken up, so have you.
Through the day (every ~30 minutes). Your timer goes off (Fix 7). Stand, walk, refill water. Every other break, add two or three stretches from Fix 8. Take calls walking. If you catch a slump between timers, one check-in scan resets it in thirty seconds.
Midday (5–10 minutes). One real break away from the desk, ideally with a short walk outside — daylight plus distance. Eat lunch somewhere that is not your chair if you can; your desk posture cannot improve if your desk is also your dining room and cinema.
Evening (5 minutes). Close the day the way you opened it: phone propped up rather than hunched over (Fix 9), a couple of easy stretches if the day was long, and a wind-down that is not just more sitting. If you are building a broader evening routine, our guide on how to start a self-care routine at home has gentle ideas that fit a desk worker’s evening.
Weekly (once). Notice what drifted. Chairs roll, books slide, timers get ignored — one quick re-run of the morning checklist keeps the whole system honest. And be kind to the timeline: habits feel deliberate for the first couple of weeks, then quietly become “just how I sit.”
When to See a Doctor or Physiotherapist
Everything in this guide is comfort and habit advice for everyday desk work. It is not a substitute for professional assessment, and some symptoms should never be waited out with a new chair cushion. Please see a doctor or physiotherapist promptly if you notice any of the following:
- Numbness or tingling in an arm, hand, leg, or foot — especially if it keeps returning or is getting worse.
- Pain that radiates — travelling down an arm or down a leg rather than staying in one spot.
- Weakness — for example, grip giving way, dropping things, or a leg that feels unreliable.
- Pain that began after an injury — a fall, a collision, lifting something that “went wrong,” or any accident.
- Pain that persists or worsens — discomfort that does not ease after a few weeks of sensible changes, or that keeps interrupting your sleep.
A professional can check what a blog post cannot, and early advice is almost always simpler than late advice. Getting checked is not overreacting — it is looking after the body you work in.
A quick health note: This article is general information about everyday comfort and habits, shared for education only — it is not medical advice and does not diagnose or treat any condition. If anything about your situation worries you, a doctor or physiotherapist is the right next step. You can also read our full Disclaimer, which covers how to use the information on this site.
Frequently Asked Questions
What is the correct sitting posture at a desk?
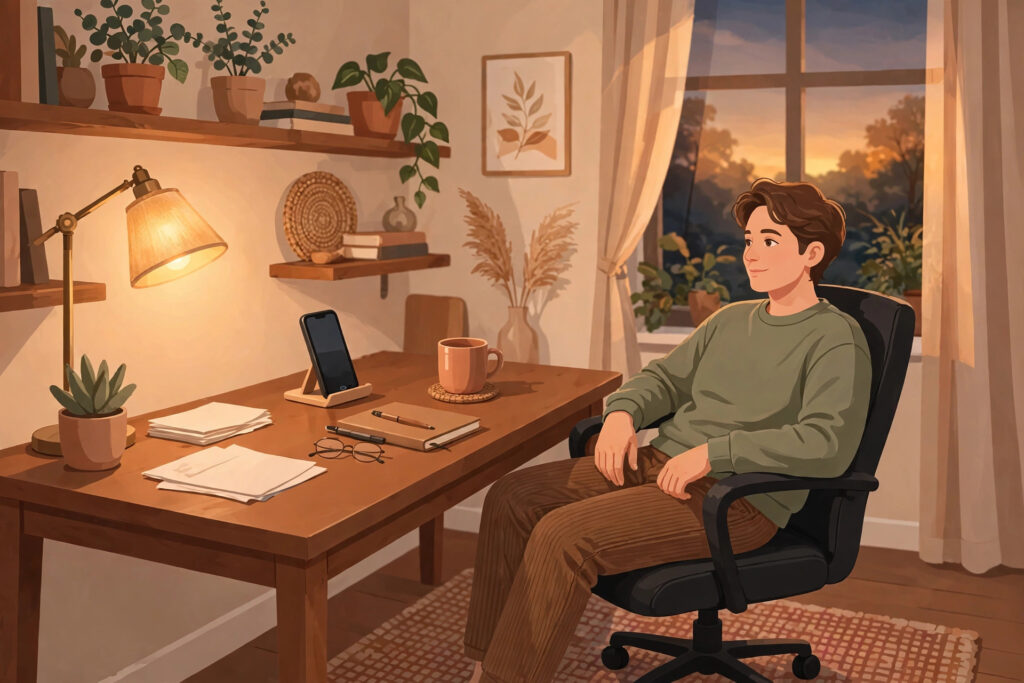
Think “supported and neutral” rather than a single rigid pose. Feet flat on the floor, knees roughly level with your hips, back resting against the backrest with a small support in your lower back, shoulders relaxed and down, elbows close to your sides at about a right angle, wrists level, and your screen about an arm’s length away with its top near eye level. Fixes 1–6 build that position step by step. Treat it as a home base to return to, not a statue to hold — keep changing position through the day.
How often should I get up from my desk?
A good rule of thumb is every 30 minutes: stand up, walk a little, or stretch for one to two minutes before sitting back down. If your work makes that genuinely impossible some hours, take the breaks you can — a longer walk at lunch, calls taken standing, stairs instead of the lift. Frequency matters more than duration; five two-minute breaks beat one ten-minute break. The 30-minute movement rule (Fix 7) shows how to make it automatic with a timer and a destination.
Do I need an expensive ergonomic chair to improve my posture?
No. An adjustable chair makes the setup easier, but the position matters more than the product — and most of the position can be achieved with an ordinary chair plus free adjustments: a cushion to raise you or support your lower back, a box under your feet, books under your screen. Spend a week with the free fixes first. If you later choose to buy anything, a decent external keyboard (for laptop users) and a chair that adjusts usually do more than any fancy accessory.
Can changing my posture get rid of my back or neck pain?
This guide is about everyday comfort and habits, not treatment — it cannot promise to fix pain, and no honest article can. Many people do find that a better setup and regular movement help their working day feel more comfortable, which is a worthwhile goal in itself. But pain that persists, worsens, radiates into an arm or leg, or comes with numbness, tingling, or weakness needs a doctor or physiotherapist, not a blog (see the red-flags section above). Consider posture changes one sensible part of looking after yourself, and professional advice the right route whenever symptoms are in the picture.
How long does it take to build better posture habits?
The setup fixes are instant — your desk can be rearranged this afternoon. The habits take a little longer: most people find the check-in scan and the 30-minute timer feel deliberate for the first one to two weeks, then start happening on their own, especially when triggers (sitting down, finishing a call, making tea) do the remembering for you. The real milestone is an afternoon where you realise you have not thought about your shoulders in hours.
Conclusion
Improving your posture at a desk turns out to be refreshingly unglamorous: a chair at the right height, a screen you do not have to dive toward, a towel rolled behind your back, a timer that tells you to stand up, and a phone you hold a little higher. None of the nine fixes needs special equipment or a gym membership — they work because they rearrange your environment and your day so the comfortable position is the one you naturally land in.
Start where the leverage is: spend fifteen minutes on Fixes 1–5 today, set the 30-minute timer tomorrow, and let the check-in scan and stretches become background habits over the next fortnight. Small adjustments, repeated daily, are how posture changes — quietly, and for good.
You will find more everyday guides like this one in our Health and Personal Care category — practical, no-hype help for feeling better in your own home and working day.